
Enamel is the route for crisp colour on metal hardware, and it is the finish most often decided too late. The constraint is physical and simple: colour sits in a recess, and the recess comes from tooling. Raising it while the part geometry is still open costs nothing; raising it afterwards costs a tool.
The recess comes first
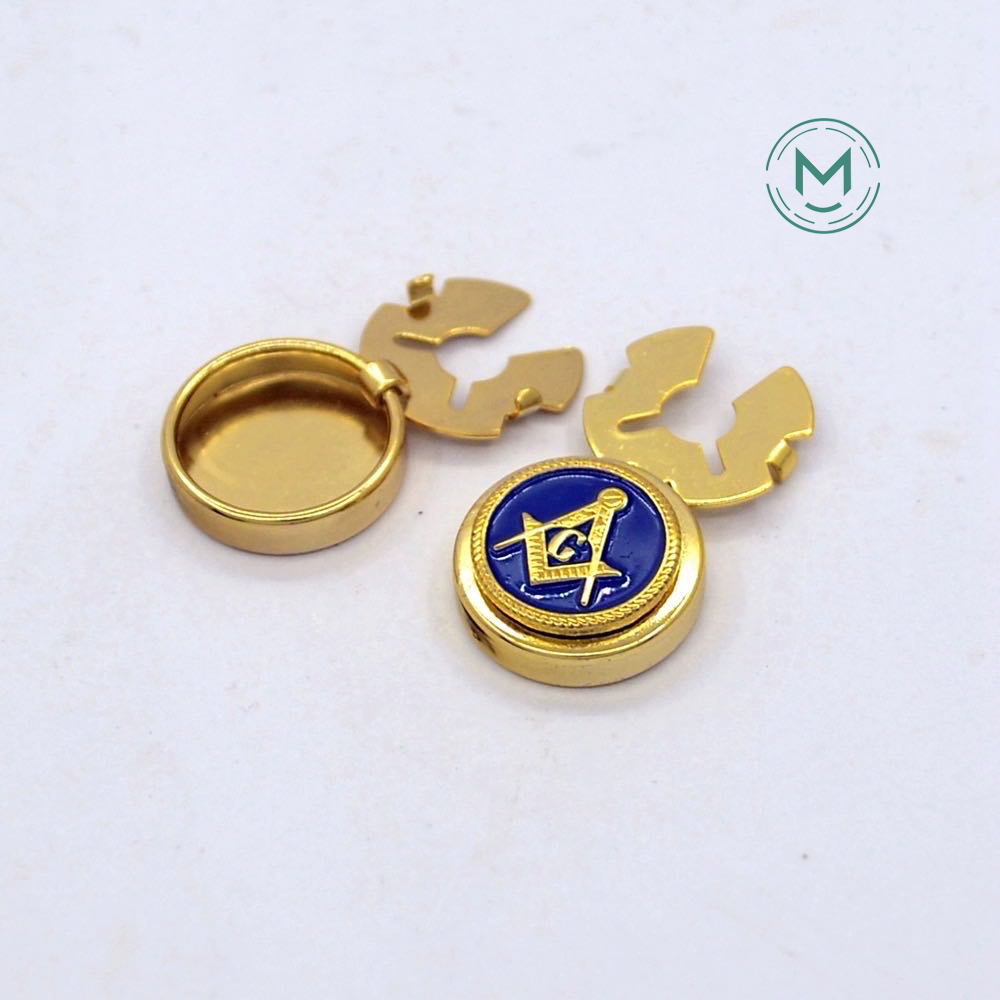
A recess is designed into the casting or stamping: a channel around a logo, a sunken panel, a cavity in a plate. Colour is deposited into it and cured, and the metal around it stays exposed.
That wall is what makes enamel worth specifying. It gives a hard, repeatable boundary that masking and printing cannot match at small scale, which is why brand marks that must stay crisp use it.
Fill depth and surface level
How full the recess is affects both look and durability. Filled level with the surrounding metal gives a flush, uniform surface. Filled slightly below leaves the metal proud, which protects the colour from abrasion because the raised metal takes the contact first.
Slightly recessed fill is usually the better choice on hardware that gets handled. State which you want; it is a real specification, not a process detail.
Colour matching
Enamel colours are matched against a physical sample, and where the hardware must match a fabric, a printed label or another trim, approve against that material rather than a standalone chip.
Note that enamel and paint of the same nominal colour do not look alike, because the surrounding metal border changes how the colour reads. Comparing an enamel sample to a painted reference is comparing two different things.
Multiple colours and separation
Several colours in one part need separate recesses divided by metal walls, or a process that can place colours accurately without them. Wall thickness between colours has a practical minimum — too thin and colours bleed into each other during filling.
If a logo has fine multi-colour detail, discuss it before tooling. The answer is sometimes to simplify the artwork for metal, which is normal work rather than a compromise.
How enamel wears
Because the colour sits below or level with the metal, the metal takes most of the abrasion. That is a structural advantage over a coating applied on a raised surface, and it is why enamel appears on hardware that lives in pockets or against clothing.
This guide states no wear or adhesion figures, because they depend on the enamel system, the recess geometry and the test. If wear matters, agree the test and the standard on your part.
What to prepare
Vector artwork with the finished mark size, the colours with physical references and what they must match, whether fill should be level or slightly recessed, the part construction and whether tooling exists, wall thickness between colours if multi-colour, the process after assembly, and quantity.
Raise enamel intent while the part geometry is being designed. That single habit prevents the most expensive version of this conversation.
Enamel is colour in a tooled recess, and the recess is the constraint. Decide it while geometry is open, choose fill level deliberately, and approve colour against the material it must match rather than a standalone chip.
 Finish Guides
 Finish Guides
 Finish Guides
 Finish Guides
 Finish Guides
 Finish Guides
 Custom Hardware Guides